


Just as brand labels, including sewing labels, stick-on patches, iron-on patches and woven stickers, come in many shapes and forms, there are many different ways to attach them to your items. The most common ways to attach brand labels include machine sewing, decorative hand stitching, and iron-on adhesives. It’s important to decide how you want to attach your brand labels before purchasing, since that will probably dictate the type of label you will need.
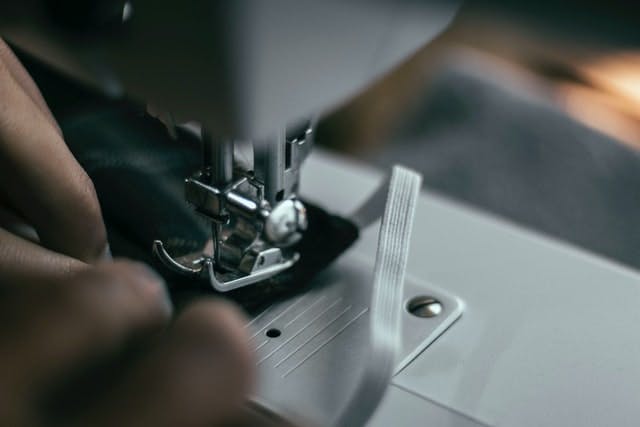
A brand label is most often found on the inside of the garment. Unless the label is sewn into a seam while being made, or attached using an iron-on adhesive, you will also need to add extra stitches to fasten it down. It’s not uncommon to notice these stitches from the outside of a garment either—if you look closely at most ready-to-wear garments you’ll see discreet stitches in a matching thread visible on the outside, holding the label in place. Some designers choose to make a statement out of these necessary stitches with decorative patterns in eye-catching colors.
A brand label doesn't always have to be on the inside though. Visible brand labels are popular on both bags and denim. It is common for jeans to have a leather brand label attached to the back waistband, or as a patch on the breast pocket of a denim jacket. If you want to make sure your items will be instantly recognizable, you might consider this approach. Companies that have their branding on the outside will also use a brand label inside, too. This works well if you have both a logo to show off outside the item, and a longer brand name or more info to detail on the inside.
How to Put Your Own Label On Clothing
To put your own label on clothing, follow these steps:
- Design your label with necessary details.
- Choose the label material and size.
- Order from a reliable supplier.
- Use a sewing machine or hand-sew to attach the label securely to the garment.
Sewing Your Labels On
Stitching your brand labels on is the most secure method, whether that is by machine or hand stitching. If properly sewed, the label will stay attached to your product throughout its lifetime while staying flexible and strong. When opting for woven brand labels or custom logo tags, consider incorporating sew-on patches for added versatility. This method ensures a robust attachment, and the label or tag remains securely affixed to your product. There are many ways to securely stitch on your woven brand labels depending on the shape and fold of your choice.
How to Attach Tags to Clothes
To attach tags to clothes, follow these steps:
- Choose the right label type (sew-on, iron-on, or adhesive).
- Position the label on the garment.
- Sew, iron, or press firmly depending on the label type.
Ensure the label is secure and visible.
Flat Labels Without Folds
Flat labels can be easily attached by sewing around the outer perimeter of your label either by machine or by hand. You can do this with plain stitches or get creative and try a speciality embroidery stitch. Flat labels sit well at the back neck, in the back facing of a coat, a waistband, or on the outside of your item as a patch.
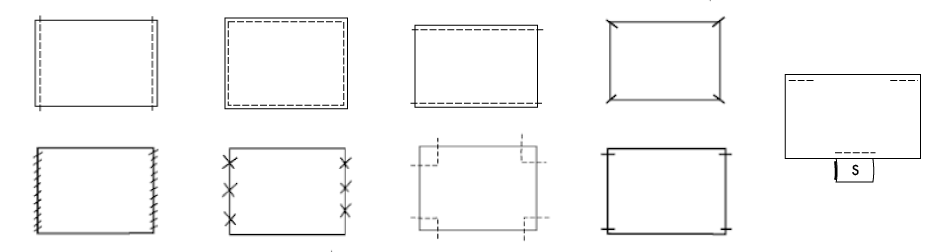
End Fold Labels
Flat labels with end folds should be sewn onto your garment or item along these folded edges. This keeps the folds in place and provides a nice soft edge when sewn. If your labels are narrow (see fig. 3), you can also use these folds as a place to attach your label to your garment without stitching showing on the face of the label.

Miter Fold Labels
Labels that have a miter fold are designed to be sewn at the top edges of the label, where it looks like two tabs. These "tabs" can be tucked into an unfinished seam (such as a back neck, waistband, or side seam), and sewn as usual. Once attached, miter fold labels create a loop which can also be used to hang a light-weight garment or item by. This is where they also get their alternative name – A Hanger Loop Label.
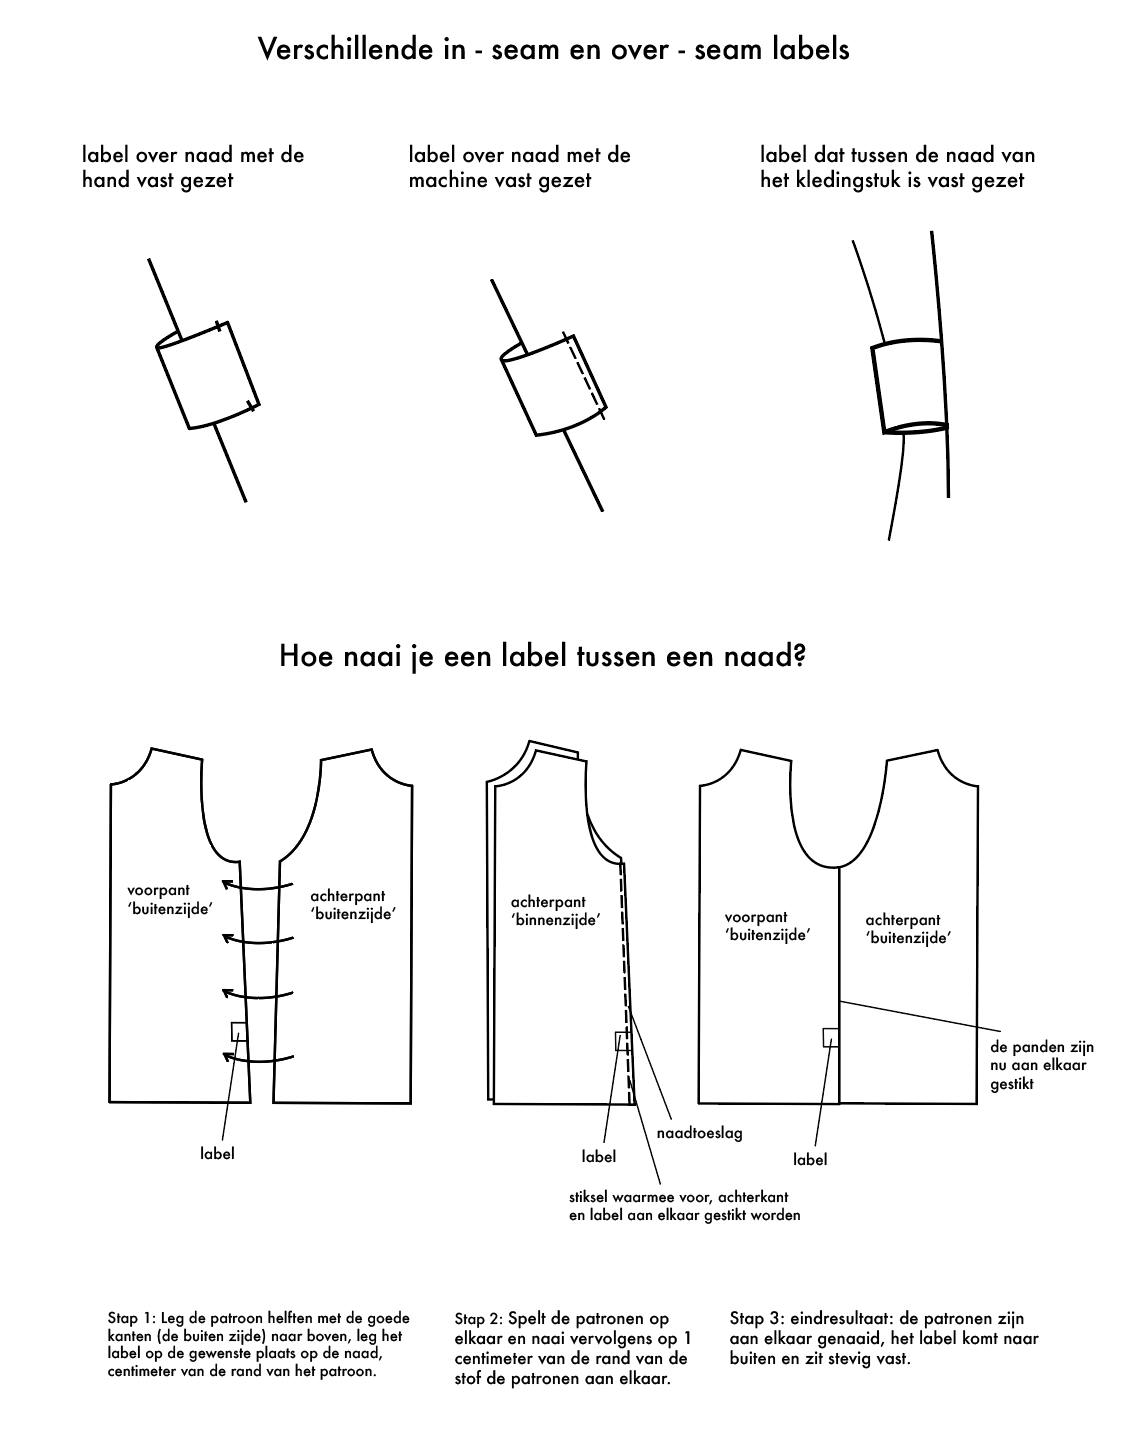
Centerfold Labels
The centerfold label is one you will usually find tucked into a side seam, waistband, or at the back neck. Both ends (opposite edge to the fold) are sewn together into the seam, creating a loop where both sides of the label can be viewed. This hides the open ends of the label in the seam allowance (or overlocking stitch), so it looks nice and tidy from the front view, and doesn't require any additional visible stitches to secure the label in place.
Hem Tags
Hem Tags are a centerfold label that are designed to be visible from the outside of a garment. They are usually small and can be found tucked into a side seam (with the label poking out) or over top of a sleeve or waist hem. Book cover folds work well as a hem tag, as the extra folds at the opposite edges of the centerfold provide a neat finish when sewn over the top of a hem.
What about Iron-On Labels?
Many woven and printed labels can have an additional heat-sensitive adhesive backing added to transform them into an iron-on label. The shape of the label is not usually an issue, so both straight and custom shapes can have this backing applied. The catch? They must always be flat labels without folds. Iron-on labels require just a standard home iron and no sewing ability, so they’re a good option for anyone who doesn't sew. They also work well when you need to attach a label to something and you don't want (or can't have) any stitching showing.
Step-by-step Guide to Applying Iron-On Labels
Before proceeding with attaching your iron-on labels, make sure to test one or two on a scrap piece of fabric that matches the exact fabric of your items. Do this first so that you can both check how the fabric reacts to the hot iron and adhesive, and to get a feel for the correct pressure to apply. Once you feel comfortable that everything looks great and the label is properly applied when cooled, you can get on with labeling your goods.
Tools Needed
- Iron that can reach at least 200ºC or 400ºF
- An ironing board or flat surface
- Parchment/baking paper
- Iron-on labels
- Scrap fabric for testing
Iron-On Instructions
- Empty any water from the iron. You do not want any steam, as this will prevent the adhesive from working properly.
- Set your iron to the hottest setting.
- While waiting for the iron to heat, make sure your label is in the correct placement. Once you apply any heat it will be impossible to move without damaging the fabric.
- Place a piece of parchment paper directly over the garment and label.
- Once hot, press iron firmly over the label for 12-20 seconds, holding the iron still.
- Remove iron and press down firmly for another few seconds with a flat surface such as a book or pattern weight.
- Wait until the area has fully cooled, then remove parchment paper and marvel at your great work.
( visual guide to attaching iron-on labels)
Step-by-step Guide to Removing Iron-On Labels
Removing iron on labels may seem daunting for the first time, however the process is fairly straight-forward, and is really just the reverse of applying the label. It might take a few tries to get the right temperature so if you have some left over iron on labels that you can test with first we recommend giving it a go on a scrap piece. Even once removed, there could be some residue or marks from the glue left (especially true for delicate fabrics such as silk). This likely can't be helped, so just keep in mind that it may not look completely perfect afterward.
Tools Needed
- Iron
- An ironing board or flat surface
- Parchment/baking paper
- Tweezers
- Label that is to be removed
Label Removal Instructions
- Heat Iron to a medium-high setting, or one that matches the ironing temperature of the care and content label of the item.
- Place a piece of parchment paper over the label and press the hot iron firmly down over the label.
- Move the iron slowly in a circular motion for 10 seconds to start.
- Remove the iron and use tweezers to peel a corner of the label while it’s still warm.
- If it comes easily, peel the entire label off. Otherwise, place the iron back over the label in 5 second increments, testing in between until the label peels off easily.
- There will likely be some adhesive residue left from the label. Use the tweezers to remove any larger bits, and if there is still residue, use soapy water or a fabric-safe adhesive remover.
( visual guide to removing iron-on labels)
The Best Way to Attach Your Brand Label by Fabric Type
Attaching a label to something made of silk requires a different method than attaching a label to, say, a pair of denim jeans. Here we cover the best application methods for different fabrics, in technical as well as stylistic terms.
Sewing guides for the following fabrics:
- Silk
- Linen
- Cotton Poplin
- Denim
- Sheer fabrics
- Leather
Subscribe to our newsletter, marketing and discount emails.
This form is protected by reCAPTCHA - the Google Privacy Policy and Terms of Service apply.